DMARC Google Workspace Setup — Add DNS Records on GoDaddy and Squarespace (Free Admin Help) | Create Google Group + Email Filter
If you are using a custom domain for your business, you might have noticed your emails suddenly landing in your clients' spam folders. Major email providers like Gmail and Yahoo now enforce strict email authentication rules. To prevent business emails going to spam, publishing a DMARC TXT record is no longer optional—it is a strict requirement.
Many tutorials suggest paying for expensive third-party tools to handle DMARC reporting. In this guide, Dozro will show you how to build a 100% free, enterprise-grade Google Workspace DMARC setup using a native Google Groups routing system.
Before proceeding, DMARC will not work unless you have already configured the foundational email records. If you haven't done that yet, please read our previous Dozro guides on configuring DKIM and SPF, as well as MX records, for Google Workspace using GoDaddy and Squarespace.
Once those are active, you are ready for this final step!
Why DMARC is Mandatory for Google Workspace
DMARC (Domain-based Message Authentication, Reporting, and Conformance) is the final layer of your email security. It acts as a set of instructions for receiving servers (like Outlook or Yahoo), telling them exactly what to do if an email claiming to be from your domain fails the SPF or DKIM checks.
Without DMARC, hackers can easily spoof your domain. With DMARC enabled, you not only protect your brand identity but significantly boost your email deliverability.
Step 1: Create a Free Google Group for DMARC Reports
Once DMARC is active, external servers will email you automated daily XML security reports. To prevent these messy files from flooding your primary inbox, we will create a dedicated routing address using Google Groups.
Log into your Google Workspace Admin Console and navigate to Directory > Groups.
Click Create Group. Name it "DMARC Reports" and set the email address to something like dmarc@yourdomain.com.
Crucial Security Step: In the Access Settings grid, locate the External column. You must check the box for "Who can post" so that outside servers like Yahoo and Microsoft can deliver their reports. Leave all other external boxes unchecked.
Set "Who can join the group" to Only invited users.
Save the group, and ensure your primary business email is added as the Owner.
Step 2: Keep Your Inbox Clean with a Gmail Filter
Now that dmarc@yourdomain.com routes directly to you, let's hide the raw data from your daily view.
Open your primary Gmail inbox and create a new label called DMARC Reports.
Click the Settings gear icon and navigate to Filters and Blocked Addresses.
Create a new filter and type your new group address (dmarc@yourdomain.com) in the "To" field.
Click Create filter.
Check two boxes: Skip the Inbox (Archive it) and Apply the label: DMARC Reports.
Click Create.
Step 3: Add the DMARC TXT Record in GoDaddy
If your domain is managed through GoDaddy, follow these steps to publish your monitoring policy.
Log into your GoDaddy DNS management dashboard.
Click Add New Record.
Set the Type to TXT.
In the Name field, type exactly _dmarc.
In the Value field, paste the following code (make sure to replace the email with your actual group address):
v=DMARC1; p=none; rua=mailto:dmarc@yourdomain.com;
Leave the TTL as Default and click Save.
Step 4: Add the DMARC TXT Record in Squarespace
If your domain is directly managed through Squarespace, the process is just as simple.
Open your Squarespace domains dashboard and select your domain.
Click on DNS, then open the DNS Settings panel.
Scroll down to Custom Records and click Add record.
Set the Type to TXT.
In the Name field, enter _dmarc. (Squarespace will automatically append your domain to the end).
In the Text field, paste your monitoring code:
v=DMARC1; p=none; rua=mailto:dmarc@yourdomain.com;
Click Save to publish the Squarespace DNS update.
The DMARC Roadmap: From Monitoring to Strict Security
Notice that the code we used includes p=none. This places your domain in monitoring mode. It is highly recommended to start here. If you immediately set strict blocking rules, you might accidentally block your own legitimate business emails (such as those sent from a CRM or website contact form).
Phase 1 (1–4 Weeks): Leave the policy at p=none. Review your reports to ensure all legitimate emails are passing authentication.
Phase 2 (2–4 Weeks): Upgrade your DNS record to p=quarantine. Failing emails will now be sent to the recipient's spam folder instead of the inbox.
Phase 3 (Final Goal): Once you are confident your setup is flawless, change the policy to p=reject. This permanently blocks anyone trying to spoof your domain and secures your ultimate sender reputation.
By following this guide, your business infrastructure is now fully authenticated, secure, and ready to reach your clients' inboxes with 100% reliability!
How to Read a DMARC Report (and What It Means)
Once your system is live, you will automatically start receiving DMARC aggregate reports from major email providers. These are sent as raw XML files compressed inside a .zip or .gz folder.
Note: First, check out my screenshot below — the Gmail filter worked perfectly. Every DMARC report skipped the primary inbox and landed neatly in the DMARC Reports label. The setup is a complete success, and if you follow the same steps, your configuration should work just as smoothly.
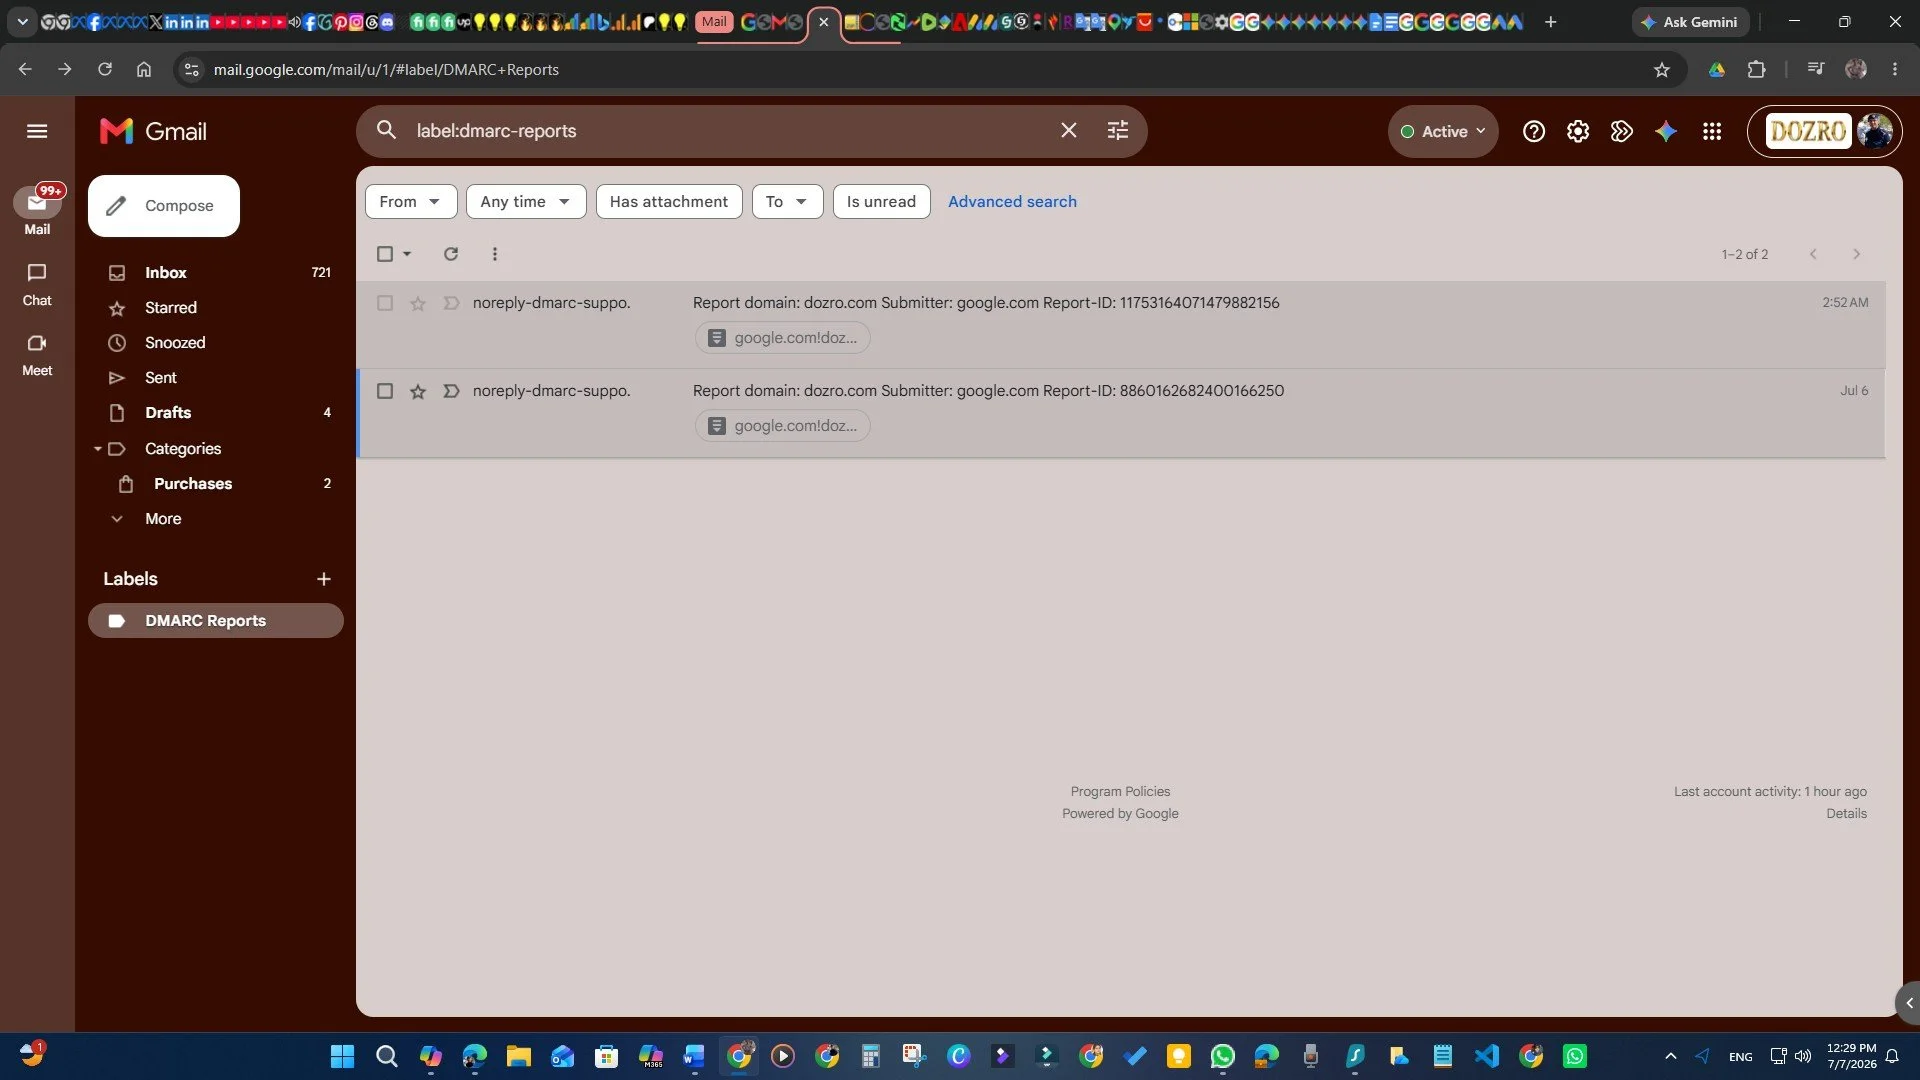
Two DMARC reports arrived within 24 hours of enabling DMARC.
If you see a similar file in your inbox with a name like google.com!dozro.com!1783209600!1783295999.xml, here is how to decode it:
google.com (The Reporter): This indicates the mail server that generated the report. In this case, Google is reporting on emails sent to Gmail or Workspace users.
dozro.com (The Subject Domain): The specific domain name being tracked and authenticated.
1783209600 to 1783295999 (The Timeframe): These numbers are Unix timestamps representing the exact 24-hour window covered by the report.
"I haven't sent any emails, so why did I receive a report?"
This is the most common question business owners ask. If you receive a report despite not sending any messages, it means unauthorized senders or malicious bots are actively attempting to spoof your domain.
Spammers frequently forge the "From" line of their emails using legitimate domain names to trick recipients. This activity is called domain spoofing.
You do not need to panic if you see these reports. Because you have already properly configured your SPF and DKIM records, receiving servers automatically recognize these fake emails as fraudulent. The report is simply a notification proving that your security layers are successfully detecting and logging unauthorized email activity behind the scenes.
How to Open and Analyze DMARC Reports (The Free AI Hack)
Receiving DMARC reports is a massive win for your domain security. However, these files are delivered in a messy XML code format designed for computers, not humans. Instead of paying a monthly fee for third-party analyzer tools to translate this data, you can use artificial intelligence to read the reports for you in seconds.
Here is the step-by-step process:
Download the Report: Open your primary Gmail inbox and navigate to the DMARC Reports label you created earlier. Click on any recent report email, hover over the attachment (usually a .zip or .xml file), and click the Download button.
Open the File: Navigate to the Downloads folder on your computer. If the file is zipped, extract it first. Then, double-click the .xml file to open it in your default web browser (like Microsoft Edge or Google Chrome). Alternatively, right-click the file and open it using a text editor like Microsoft Word, Notepad, or Visual Studio Code.
Copy the Raw Code: Once the file is open, it will look like a massive wall of confusing code. Don't worry about trying to understand it. Simply press Ctrl + A (Windows) or Cmd + A (Mac) to highlight everything, and copy the text.
Let AI Do the Heavy Lifting: Open your favorite AI assistant—such as Google Gemini, Microsoft Copilot, or ChatGPT. Paste the raw XML code into the chat box along with a simple prompt like this:
"Here is my raw DMARC XML report. Please analyze it in simple English. Tell me if anyone is spoofing my domain, and explain how the receiving servers handled the emails."
Within seconds, the AI tool will translate the technical jargon into a clear, plain-English summary. It will tell you exactly who is trying to spoof your domain, which unauthorized IP addresses were used, and how receiving servers (like Gmail or Yahoo) successfully caught the fake emails using your new DMARC policy!
Need Help?
Get direct assistance from Irfan Hayat, founder of Dozro, with complete trust and transparency. I’ll personally set up your Google Workspace MX records, SPF, DKIM, and DMARC for any domain host — including GoDaddy, Squarespace, Namecheap, Hostinger, Bluehost, and more.
You can also request a full DNS audit to identify issues, misconfigurations, or spoofing attempts. Service price ranges from $100 to $250, depending on the complexity of your domain setup.
Go To Our Home page for excellent content.